After binge-watching a bunch of Jamie Oliver’s Comfort Food episodes, I got totally stuck into one of his dishes: Lobster mac ‘n’ cheese.
I ended up making Mac n Cheese without the lobster on two occasions – once with a well-planned shopping list (Let’s call this Mac 1), and the other on a complete whim (which means I used whatever I could find in the fridge – Mac 1a-be).
On a scale of 1 – 10 (1 being easy cheesy macaroni, and 10 being show-off), I’d rate this a 5.
Serves 6-7 hungry humans
Mac 1
2 yellow onions
4 cloves of garlic
50 g unsalted butter
1 pinch of nutmeg powder (freshly grated would be better)
½ teaspoon cayenne pepper
1 pinch of paprika
3 bay leaves
2 anchovy fillets
200g beef bacon, diced/cut up however you want them
50 g plain flour
50 ml cooking cream
1.1 litres milk
2 teaspoons English mustard
100 g Cheddar cheese (Mature or Sharp would be best)
100 g Parmesan cheese
400 g macaroni
Salt and pepper to taste
Pinch of chilli flakes (optional)
Mac 1a-be
All the above, plus:
½ cup of breadcrumbs (Make your own – whizz up stale bread in food processor or Panko would do nicely too)
2 extra cloves of garlic
½ cube of chicken stock (cube) and
100 g pepperoni instead of beef bacon and
100 g of Mozzarella instead of Cheddar
Peel and finely chop the onions and garlic. Chuck the butter into a deep-ish pan (you’re making the sauce in this) on medium heat, then cook the onions, garlic, anchovy fillets, and bacon. Resist from eating and don’t worry about the anchovies – they’ll melt away into umami goodness. Once the onion starts looking translucent, stir in the flour, followed by the milk, cream, mustard, nutmeg powder, paprika, cayenne pepper, and bay leaves. Mix well and simmer for 10 minutes. It might look clumpy and crap for a while, but trust me it’s meant to look that way initially! Sorry I don’t have photos of this step as I was too busy freaking out myself… If you’re a noob in the kitchen like me, congratulations! You’ve made a roux.
While waiting for the mixture to simmer for 10 minutes, get your macaroni cooking in a pan of boiling salted water according to the packet instructions, then drain. It’ll clump up and stick to each other as it sits aside, but will separate once you put it in the cheese sauce. Go on and pre-heat your oven at 180°C while you’re at it.
If you’re using chicken stock, crumble and add it to the simmering mixture now. Stir until you’re sure there are no clumps of stock in it, and turn the heat down to low. Here comes the best part (Second best, best is the eating part) – add the cheddar and parmesan while gradually stirring the mixture. Leave at least two handfuls of cheese for the topping though! Now if you prefer your sauce to be thicker, add more cheese or flour (gradually, in small increments), but I recommend patience as it will thicken naturally after you let it be for a bit. If you prefer it runnier, add milk. Add salt and pepper to taste.
Stir in the pasta and gush over how luscious the whole thing looks and once again, resist from eating. This is your last chance to taste it again; check if you have seasoned it enough. Pick out the 3 bay leaves and dispose, too.
Once you’ve mixed all the pasta in and each piece of macaroni looks reasonably smothered in sauce, pour out into a large ovenproof casserole pan like I did for Mac 1, or into individual ramekins like I did for Mac 1a-be. Sprinkle the leftover cheese and top with the breadcrumbs.
Stick it in the oven for about 15 minutes or until the top layer looks golden brown, with obvious crunchy bits looking perfectly toasted. As you can see from my photos, I was much too impatient and the breadcrumbs hardly had time to get a tan…
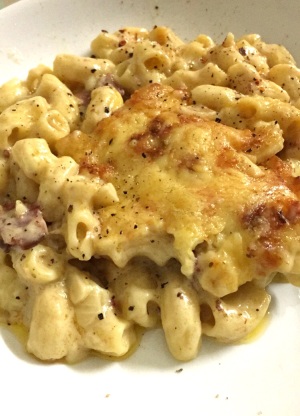
This is Mac 1.
It tasted better than expected, but would’ve been loads better if I had added more salt to the sauce and breadcrumbs to the topping. I threw in a tiny pinch of chilli flakes before tucking in and it gave it a really nice warmth. Overall, it had a better flavour profile than Mac 1a-be, possibly due to the types of cheese used and that Mac 1a-be had way too much garlic in it. Also, having had assistance from the bf who is a cook helped a lot. Who am I kidding I was the assistance lol
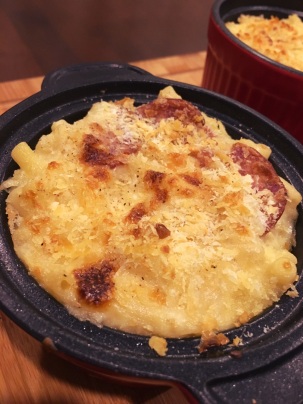
This is Mac 1a-be.
This was so close to being great! Unfortunately, my itchy hands led to a disastrously overpowering garlic taste. The crunch from the breadcrumbs was so good though, and the chicken stock really bound all the flavours of the sauce together nicely. I’m not against the sexy cheese strings produced by the Mozzarella used, but would have been better with Cheddar in it.
Sexy cheese strings
In future, I’ll be making Mac 1a-be with the right cheeses (Cheddar, Parmesan, Gruyere if my budget allows, and maybe some Mozzarella still because – refer to .gif on the right), beef bacon, and only 4 cloves of garlic…
For now, I’m gonna stuff myself silly with leftovers.
